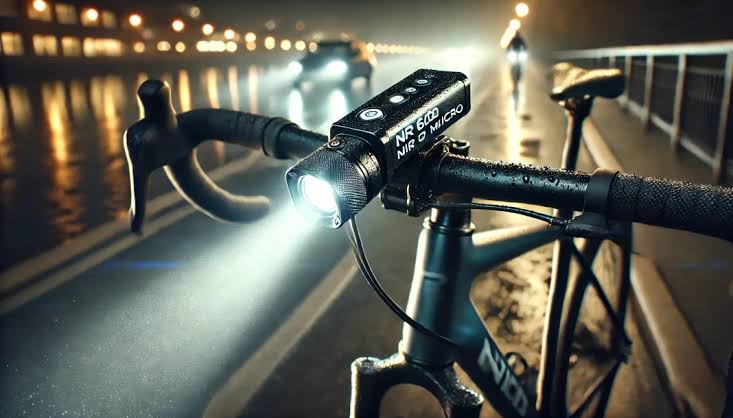
The NR 600 Micro Bike Light is a compact yet powerful lighting solution designed to keep cyclists safe and visible during nighttime rides or low-light conditions. Whether you’re an avid commuter, a weekend rider, or a competitive cyclist, this light offers excellent illumination with ease of use and portability. If you’re looking to get the most out of your NR 600 Micro Bike Light, this manual will guide you through its features, setup, usage, and maintenance to ensure a smooth cycling experience.
What’s Inside the NR 600 Micro Bike Light Box?
Before diving into the instructions, let’s first take a look at what comes with your NR 600 Micro Bike Light package:
- NR 600 Micro Bike Light
- Handlebar Mounting Bracket
- USB Charging Cable
- Quick Release Strap (for easy mounting and dismounting)
- User Manual (this guide)
- Rubber O-Ring Mount (for different handlebar sizes)
Features of the NR 600 Micro Bike Light
The NR 600 Micro Bike Light is built with the latest lighting technology and a sleek, durable design. Here are some of its key features:
- 600 Lumens of Brightness: The NR 600 provides powerful illumination, making it perfect for riding in dark environments or navigating through dimly lit streets.
- Multiple Light Modes: The bike light offers different modes such as High, Medium, Low, Flashing, and Eco, giving you the flexibility to adjust the brightness according to your needs.
- Compact and Lightweight: Its small size ensures it doesn’t add unnecessary bulk to your bike, making it ideal for those who prefer a minimalist setup.
- USB Rechargeable: The NR 600 Micro comes with a built-in USB rechargeable battery, saving you money on disposable batteries and reducing waste.

- IPX4 Waterproof Rating: Rain or shine, this bike light will continue to perform without issue, as it’s designed to withstand light rain and splashes.
- Wide Beam Angle: Offers a broad beam that ensures visibility from a wider range of angles, improving your safety on the road.
Setting Up Your NR 600 Micro Bike Light
- Charging the Light
Before using the light for the first time, fully charge it using the included USB cable. Connect the USB cable to the charging port on the back of the light and plug the other end into a computer or wall adapter. A full charge typically takes around 3 hours, and the light will last up to 8 hours on lower settings. - Mounting the Light on Your Bike
The NR 600 Micro Bike Light can be easily mounted on your handlebars using the included mounting bracket and quick-release strap.
- Step 1: Slide the rubber mounting bracket over your handlebars.
- Step 2: Attach the light to the bracket, aligning the grooves.
- Step 3: Use the quick-release strap to secure the light in place. Ensure it’s tightly fitted, but avoid over-tightening.
- Adjusting the Beam Angle
Once mounted, you can adjust the light’s beam angle to ensure it illuminates the road ahead. The NR 600 has a flexible design, so you can tilt the light up or down for optimal positioning.
Operating Your NR 600 Micro Bike Light
- Turning the Light On/Off
To turn the light on, press and hold the power button for 2 seconds. To turn it off, press and hold the button again for 2 seconds. - Selecting Light Modes
The NR 600 offers multiple light modes to accommodate different riding conditions:
- High Mode: Provides the maximum brightness (600 lumens) for maximum visibility.
- Medium Mode: A balanced brightness that offers a longer battery life while still providing adequate light.
- Low Mode: Ideal for conserving battery life during shorter rides or in environments where minimal light is needed.
- Flashing Mode: A strobe effect designed to increase your visibility to other cyclists or motorists.
- Eco Mode: A low-brightness setting that maximizes battery life for extended rides. To change modes, press the power button repeatedly to cycle through the settings. The light will flash briefly to indicate which mode you’ve selected.
- Battery Indicator
The NR 600 Micro features a battery indicator light, so you can easily monitor how much power remains:
- Green Light: Full battery (80-100% charge)
- Yellow Light: Medium battery (40-79% charge)
- Red Light: Low battery (below 40% charge) Keep an eye on the battery indicator to avoid running out of light during a ride.
Maintenance and Care Tips
To keep your NR 600 Micro Bike Light in top condition, follow these simple maintenance tips:
- Cleaning the Light
After every ride, wipe the light with a clean, dry cloth to remove any dirt, dust, or moisture. Avoid using abrasive cleaning materials that could scratch the surface of the light. - Charging
To prolong the life of your light’s battery, avoid letting it fully discharge regularly. Charging it when it reaches around 20-30% is ideal. Additionally, store the light in a cool, dry place when not in use for extended periods. - Inspecting the Mounting Bracket
Regularly check the mounting bracket and straps to ensure they are secure and free from damage. If any part becomes worn or loose, replace it to ensure the light stays safely attached to your bike. - Water Resistance
While the NR 600 Micro is rated for light rain and splashes (IPX4), it’s not designed for submersion in water. If the light gets wet, dry it off thoroughly before storing it.
Troubleshooting
If you’re encountering issues with your NR 600 Micro Bike Light, here are a few common solutions:
- Light Won’t Turn On: Ensure the light is fully charged. If the battery is drained, charge it fully before attempting to turn it on again.
- Flashing Light: If the light starts flashing unexpectedly, it could indicate a low battery or malfunction. Try charging it fully, and if the issue persists, contact customer support.
- Weak Light Output: If the light seems dimmer than usual, check the battery indicator to see if it needs charging.
Conclusion
The NR 600 Micro Bike Light offers exceptional performance in a compact and durable package, making it the ideal choice for cyclists who need reliable lighting for their rides. With easy installation, multiple light modes, and long battery life, this light will ensure you stay visible and safe during nighttime rides or in low-light conditions.
By following the simple steps in this manual, you’ll be able to get the most out of your NR 600 Micro Bike Light and enjoy many safe, well-lit rides ahead!


